Discover EverTune
EverTune Buying Guide
- Bridge Buying Guide
- Guitar Buying Guide
- Most Asked Bridge Questions
- Bridge Tech Specs
- Tunings & String Gauges
- String Tension Gauge Calculator
- Installation Service Options
- International Dealer Directory
- Legal
For Players
- User Manual
- Quick Start Guide
- Tunings & String Gauges
- String Tension Gauge Calculator
- Maintenance
- Troubleshooting
- Repairs
- Legal
For Installers
- Instructions / Drawings / CAD For Bridge Installation
- Routing + Installation Videos
- Become An Installer
New Products
Quick Start Guide
Here are the EXTREMELY Quick Start Instructions in 5 Easy steps. We suggest reviewing the EverTune User Manual PDF and the Quick Start Set Up Instructions PDF before diving into these steps for the first time. Should be done for EACH string.
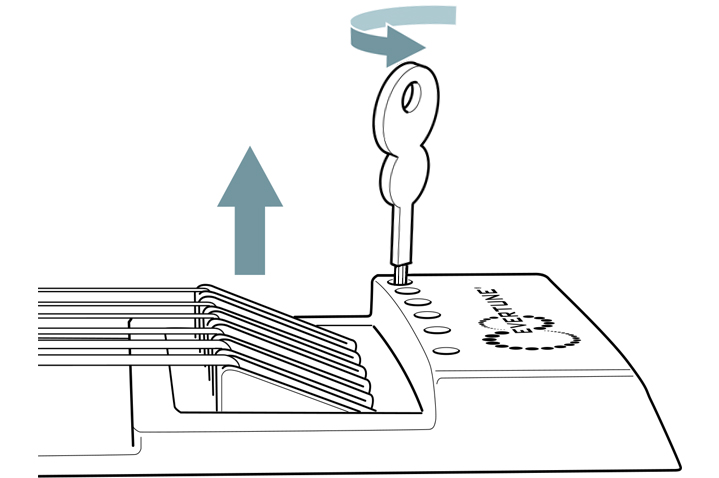
STEP 1: Activate Each EverTune Saddle (required)
Get each saddle into Zone 2 using the tuning pegs.
Before even looking at a tuner, get used to finding Zone 2. This is EverTune's Active Zone.
Using Your Ears:
Loosen the tuning peg at the headstock until the string is slack
Then tighten the tuning peg WHILE plucking the note
Keep tightening the tuning peg and plucking the note until the pitch of the note stays constant
Then tighten the tuning peg 2 more half turns. Congratulations! You are now in Zone 2.
Video Demonstration
To see how this takes just seconds per string, check out the video clip to the right.below.
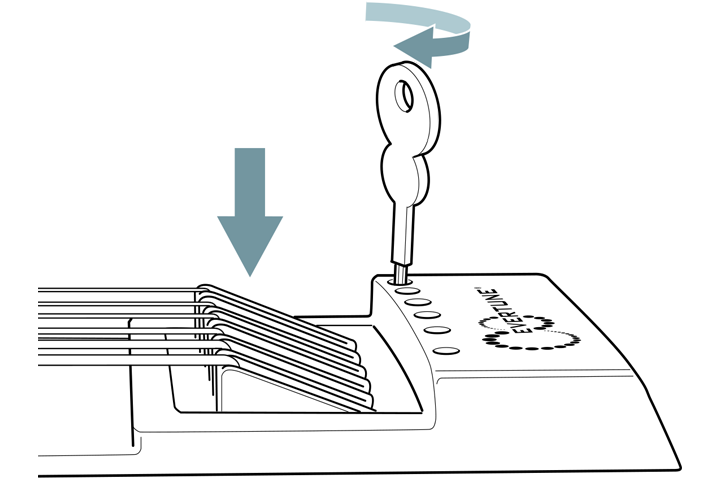
STEP 2: Tune The String (required)
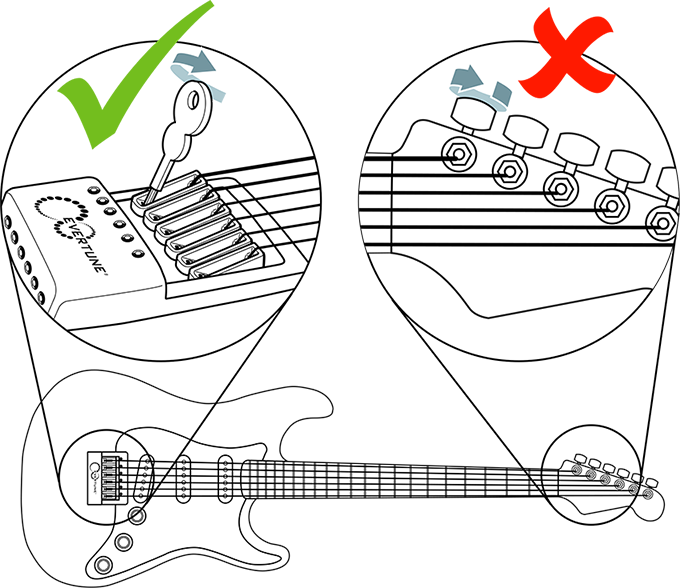
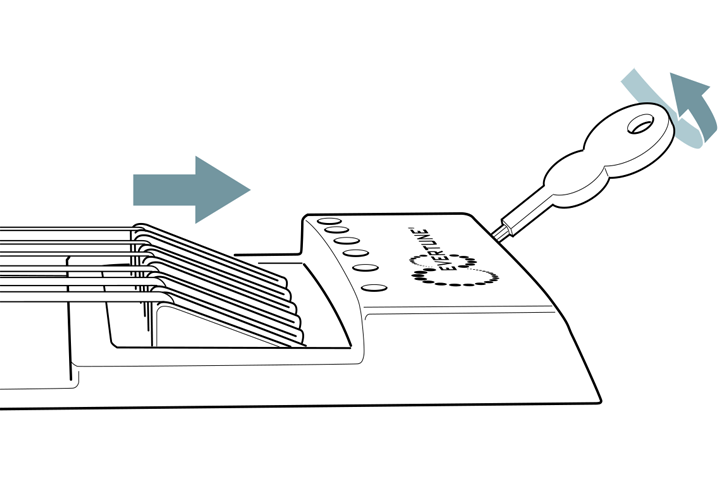
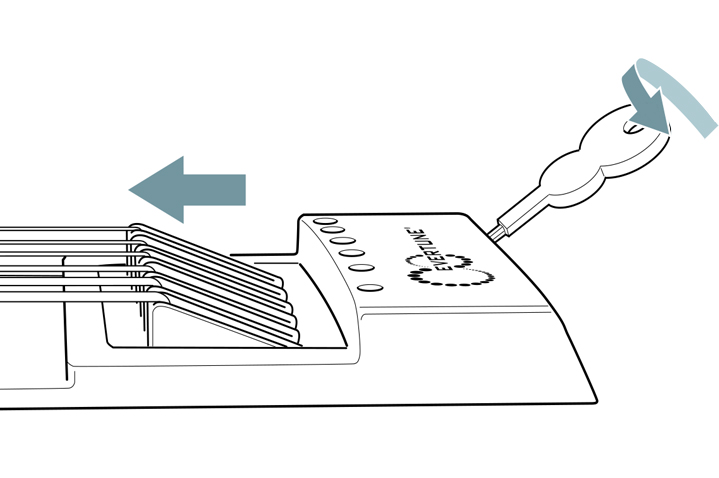
Tuning strings at the bridge with the hex key.
Here we stop using the guitar's pegs.
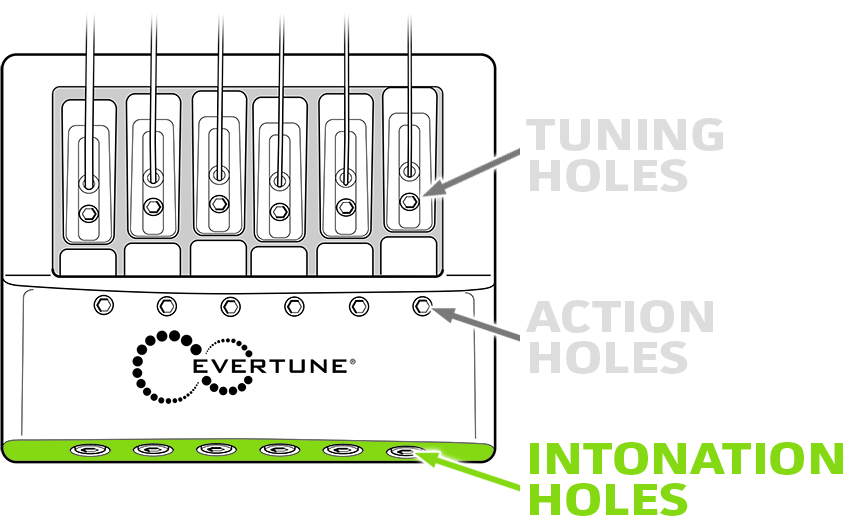
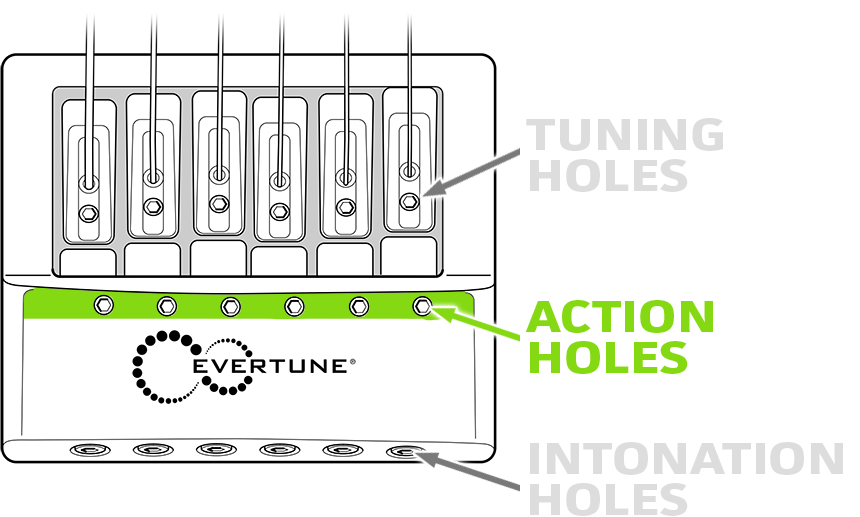
Locating the tuning screws
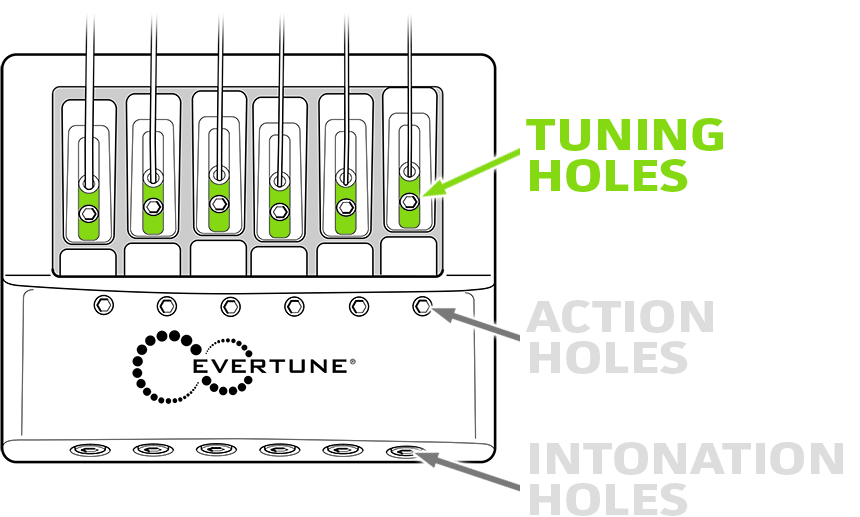
To tune the string, insert the EverTune hex key into the tuning hole RIGHT behind the saddle, shown in the green highlights to the rightbelow.
The hole is VERY close to where the string comes out the saddle and it’s almost invisible. The hex key should enter at an angle.
To Increase or Decrease Pitch
Ready? Now plug in a tuner, pluck the note and check the tune.
Turn the hex key clockwise to increase the pitch.
To decrease the pitch, turn the hex key counter-clockwise.
Remove the hex key and check the tune again. Repeat until the string is in tune.
CAUTION: If the hex key becomes hard to turn STOP TURNING IT, the tuners may have reached the end of their range. If this happens, please contact us at [email protected]. We will respond promptly.
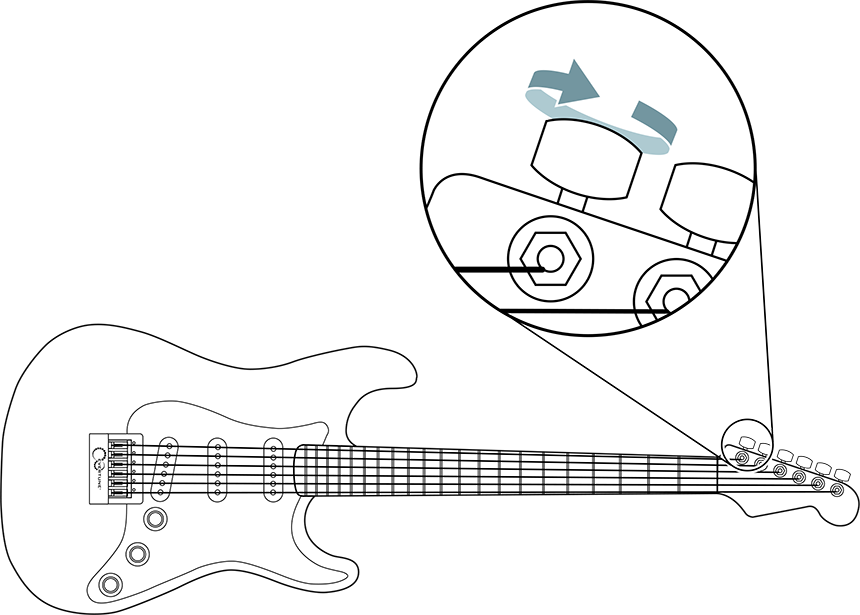
STEP 3: Set The Bend Sensitivity (required)
Setting the bend sensitivity, also called "playing position", must be done after every adjustment. This is because every adjustment moves the saddle to a different point in Zone 2 and it can even move it out of Zone 2.
Here the guitar's pegs are used to set your bending and vibrato preferences.
Bend sensitivity is probably the most important thing after being in tune. Each saddle on an EverTune bridge can be set for fast bending of notes and for no bending of notes and everywhere in between.
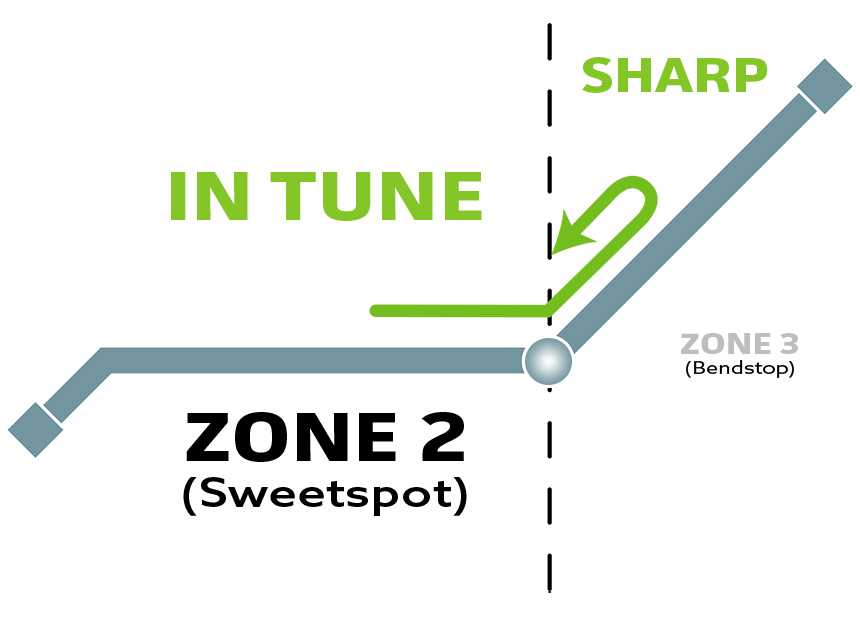
(A) Fastest bends and vibratos:
Pluck the string and tighten the tuning peg until the note goes sharp and then loosen the tuning peg until the note is EXACTLY back in tune. Leaving it here will produce fastest changes in pitch, while being prone to going sharp if you over-fret.
(B) Fast bends and maximum intonation:
Same as above, then loosen the tuning peg another 1/8 turn.
(C) To turn bending off and always maintain perfect tune:
Same as above, then loosen the tuning peg 2 more half turns.
Video Demonstration
To see how this takes just seconds per string, check out the video clip to the right.below.
STEP 4: Adjust String Length (optional)
Intonation
Make sure the string is in tune and setup to bend (steps 1-3). Usually only has to be set once unless the player changes string gauges and tunings.
Locating the intonation screws
The intonation screws are the ones on the very rear of the bridge, shown in the green highlights to the right.below.
Ready? Now plug in a tuner, pluck the note and check the tune.
If the 12th fret note is sharp:
Loosen the tuning peg at the head stock a half turn, tighten the intonation screw 3 half turns, then reset the desired bend sensitivity (step 3).
Now recheck the open note and 12th fret note and repeat until the open note and 12th fret note are both in tune.
If the 12th fret note is flat:
Loosen the intonation screw 3 half turns then reset the desired bend sensitivity (step 3).
Now recheck the open note and 12th fret note and repeat until both notes are in tune.
STEP 5: Adjust String Height (optional)
Action
Make sure the string is in tune and setup to bend (steps 1-3). Usually only has to be set once unless the player changes string gauges and tunings.
Locating the action screws
Insert the EverTune hex key into the hex screw hole on the very top of the bridge, shown in the green highlights to the rightbelow.
Setting the Action
To raise the string height, turn the hex key counter-clockwise.
To lower the string height, turn the hex key clockwise.